For whom is this course?
We won’t be taking anything for granted; if you don’t understand something, ask a question (see the Getting support section below). This course is for anyone who wants to an intro to web development best practices with a focus on Drupal and Jekyll websites.
There is no single way of doing things. I have been documenting my own best practices under the Dcycle brand since 2009, and this is the result. At the heart of my approach are the following pillars:
- DevOps: a formal codified way to define server configuration with your code (don’t worry if you don’t understand what this means, we’ll see it later).
- Continuous integration: continually make sure your code is up to par.
- Standardized deployment: whatever you build should be deployable, without the content, in a few steps.
- Test-driven development: most of your code should be tested; we’ll show you how.
Our approach will focus on procedures and development methods, not tools. We will learn as little as possible about the technologies we will be using, in order for them to be useful to us. You will not be an expert in Drupal or any other specific technology at the end of this course. However, this course will give you the tools you need to understand some web development best practices.
We will be using exclusively open-source technology, and an open workflow, with the premise that sharing code and resources is ultimately better for everyone.
We will avoid where possible visual tools such as graphical user interfaces and wysiwyg. This may seem off-putting at first, but I am convinced that best practices require solid foundations, and early on we’ll use the command line for most of our work.
Getting started
This course is separated into classes, each class is separated into lessons. To get the most of this course you should:
- Set aside several hours at a time for each lesson, for a total of at least 80 hours, probably more depending on your skill level.
- Make sure you you complete the hands-on section at the end of each section (including this one).
- Have a Mac OS or Linux computer. If you are using Windows, make sure you can install Vagrant; Windows users are encouraged to document their progress but I will not provide support for Windows.
- Keep a notebook handy and use it.
- Most of all, be curious, go beyond the suggested exercices, search the web if you’re interested in deepening your understanding of any of the topics herein. Curiosity and the willingness to learn new things and challenge assumptions is the number one asset of any developer.
Hands on: your online identity and GitHub account
All along this course, you will be opening accounts on various sites and services. If you don’t already have a nickname, choose one now, and open your first account on GitHub if you don’t have one already. (My online identity is alberto56).
Make sure you verify your email address by clicking on the verify link that GitHub sends you, or else you might get some strange behaviour from GitHub later on.
Hands on: fork your first project
GitHub is a collection of mostly open source software projects; it is designed to make it very easy to clone projects and start working on them yourself. Your first project will be a clone (called a fork) of an existing site written in Jekyll and hosted on GitHub. Don’t worry if you don’t know what Jekyll is, just follow along:
- Start by logging onto GitHub.
- Navigate to the Clean Blog project.
- Find the “Fork” button a click on it.

- After a few seconds, you will have your first GitHub project, which is the clone of an existing project.
Hands on: host your new project GitHub
-
Your new project (an exact replica of the Clean Blog project for now) is a website, and it’s hosted for free on GitHub.
-
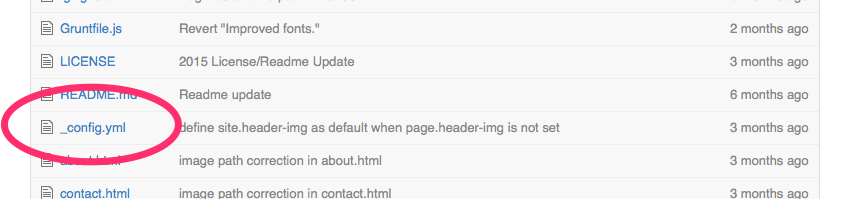
At the time of this writing, you need to make at least one change to your site in order to publish it, and for your site to be hosted. We’ll just change its name: start by modifying the
_config.ymlfile by clicking on it.
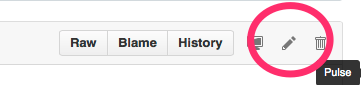
- Once you see the contents of that file, click the Edit icon
-
On the edit page, change
title: Clean Blogtotitle: My Great Blog, or whatever your want, then save the document by clicking the Commit changes button at the bottom of the screen. -
Now click on
startbootstrap-clean-blog-jekyllto go back to the project page, then go to the “Settings” page.

- On the “Settings” page, look for the “GitHub Pages” section, and the URL of your new website will be shown. Look for “Your site is published at … “. (Not all GitHub projects have an associated website: code with a branch called
gh-pageswill be published. We’ll look at git branching later on.)

-
Click on that link, it should look something like
http://dcycleproject.github.io/startbootstrap-clean-blog-jekyllbut with your own username in the URL. -
You should now be seeing a blog, which will look a lot like the site you’re on right now! In fact DcycleU is based on the same theme, and its source code can be found here. (Yes you can fork that too!)
Hands on: your first issue
Most of your work from now on will be in issues: these can be on Drupal.org, GitHub, or your company’s issue tracker (Jira, Redmine, and Phabricator are some common issue trackers). Communities tend to aggregate around issue trackers, with specific cultures (for example, on Drupal.org you will be expected to follow certain rules when submitting and dealing with issues).
Now that you have a project on GitHub, you can start managing your own issue queue:
- Visit the “Settings” page on your project GitHub page.
- Check the “Issues” checkbox.

- Wait a few seconds, this will make an “issues” icon (A circle with an exclamation point) appear to the right of your project.
![]()
- Click on that icon, and then click on the green “New Issue” button at the top right.
- For now we’ll submit a very simple issue: “Write a more compelling subtitle”.
- Save it, and if you go back to your issue queue, it will now look like this:
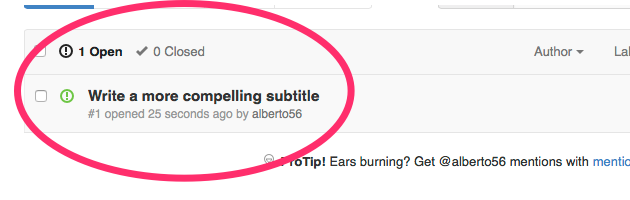
- Note the issue number: #1, and keep it in mind for later.
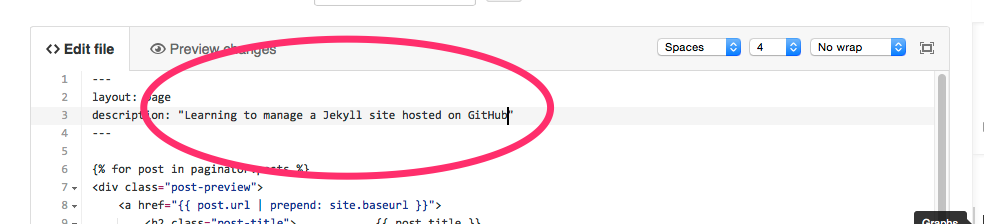
- Now we’ll resolve this issue. Earlier, you edited
_config.ymlfile. Now go back and editindex.htmlchange the subtitle (which is the description) to something else, but don’t save it yet.
- Before saving with the Commit changes button, change the Commit changes messages to anything you want, but be sure to add the issue number (“#1”) somewhere in the message:
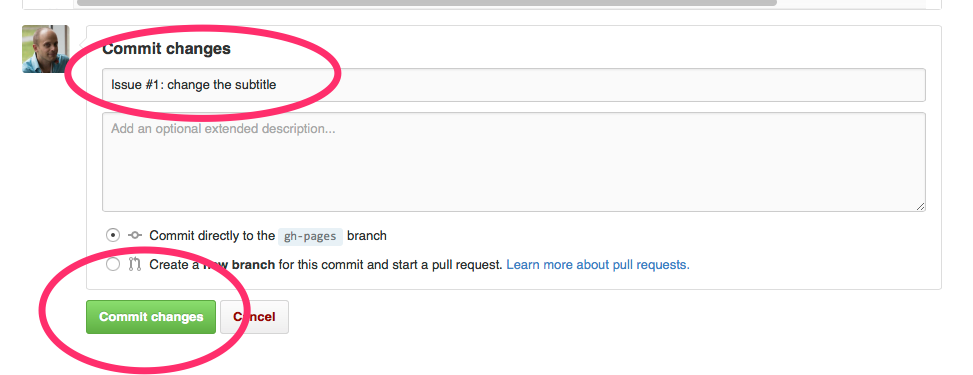
- Now commit your changes and head back to your issue. You will see it has been linked to your commit, or the change you made.
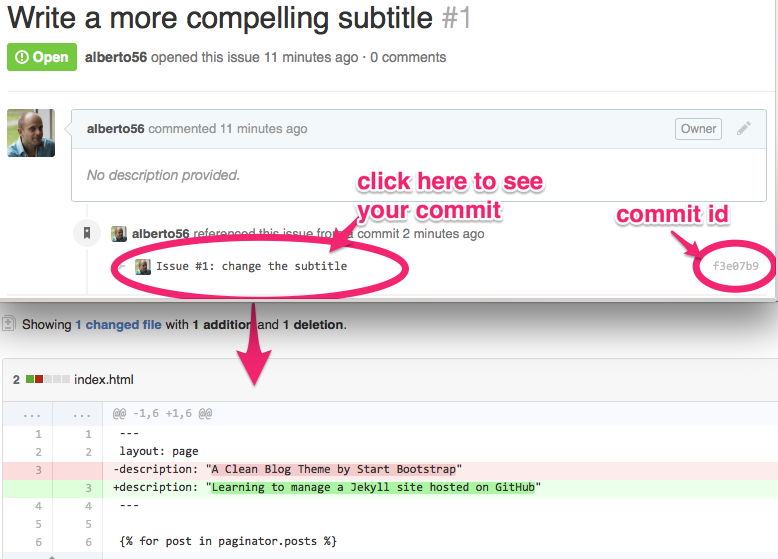
By now you will begin to see the power of version control: everything we do should ideally be linked to a commit (a modification to code small enough to be understandable, yet important enough to have business value), and should ideally be explained in an issue. Change made to projects outside of version control are dangerous: they can’t be traced, reproduced, or explained. All along this course, we will do everything through version control with Git.
Git is a version control tool which has become a standard; it is used by GitHub, Drupal.org, and many web development shops. We’ll learn more about what makes it essential in a later class.
Getting support for this course
If you find a typo, an error, or have a question, encounter an error when following instructions, or require clarification (or simply want to share something), you should report these in the DcycleU issue queue. This course and its associated website is an open-source GitHub project whose source code you can examine and copy (as long as you attribute it to Dcycle).
Troubleshooting
By now you should have a working site as a project on your GitHub account, with an issue queue and at least one issue. If you had any problems until now, you will have submitted an issue on the Dcycle U. issue queue.
- If your site is not updated as expected on GitHub, make sure you have verified your email address, or else your site may update once but not thereafter.
- If you have a verified email address and your site is still not updating, see Troubleshooting GitHub Pages Build Failtures, on GitHub.
Before moving on:
Before going on to the next lesson, make sure:
- you have a GitHub account registered under a username which will become your online identity.
- you have a project (called a repository) on your GitHub account.
- you have at least one issue on your project’s issue queue.
- you’ve made at least one change to your project, and linked it to your issue.