Virtualization
In lesson 1.1. we saw how to set up our first project and make changes to it. This was all done on the GitHub web interface, which has its limitations.
The next logical step is to figure out how to develop (i.e. make changes to a project) on your local machine.
However, everyone’s local machine has different operating systems, different software, end even when two developers have the same software, they often have different versions of the same software, or the software is configured differently.
This is a headache that we will completely remove from our workflow by using virtualization: the only required software you need to install on your machine is the software which will allow you to launch virtual machines.
Think of virtual machines (VMs), as well as more lightweight “containers” (we’ll see the difference later on), as temporary, virtual computers which run on your laptop.
VMs and containers are “guests”, and your laptop is the “host”.
Guests are isolated from the host, which means whatever you do on the guest won’t affect the host; if you screw something up on the guest, you can simply destroy it and start from scratch. Likewise, if you must update software on your host computer, it won’t affect the guest; If you lose your computer, all you need to do to get up and running again is find a new computer, install the few pieces of software we will introduce in this lesson, download whatever site it is you’re working on, and get on with your job.
In this approach, whatever it is your software requires to run properly (a webserver, a specific version of PHP, etc.), is defined along with your software itself. This same information can then be used to set up local development environments, but also testing and production environments. This approach is known as DevOps and will save you dozens, even hundreds of hours in the coming years. (DevOps is a contraction of development and operations, and aims to bring together two traditionally separate aspects of software creation: the code—development—and the servers and environments—operations).
Let’s get started!
Installing Vagrant and VirtualBox on your local machine
Whether you are running Mac OS, Linux, or Windows, you only need to install the following open-source software on your machine in order to develop anything we’ll touch upon in this course:
- VirtualBox, which allows you to create Virtual Machines on your laptop.
- Vagrant, a command-line interface for VirtualBox (we want to move away from graphical user interfaces and do most of our work on the command line, like professionals).
- coreos-vagrant, A virtual machine running a system called CoreOS and created with Vagrant.
- A plain text editor, to allow you to edit plain text (unformatted) files. This is essential to write and edit code.
VirtualBox
VirtualBox allows you to easily simulate any number of computers (limited only by your system RAM and storage) running on your host computer.
Install it using the installation instructions for your platform and look for help (as discussed in the previous lesson), then file a support issue if you get stuck.
Vagrant
Vagrant is a command-line wrapper around VirtualBox, among other things.
Download and install it using the installation instructions for your platform.
Make sure you can open the Terminal application which comes with your Mac OS or Linux computer, or, on Windows, the Command Prompt (Windows users might have to install more software like PuTTy – more info on Vagrant for Windows here), and type:
vagrant up
You should be seeing something like:
A Vagrant environment or target machine is required to run this
command. Run `vagrant init` to create a new Vagrant environment. Or,
get an ID of a target machine from `vagrant global-status` to run
this command on. A final option is to change to a directory with a
Vagrantfile and to try again.

The fact that you’re getting this notice means that Vagrant has been correctly installed. It is telling you that you need to tell it more about the virtual machine you want to set up before using vagrant up. We’ll get to that.
Deciding on a development folder
Figure out where on your computer you want your development to take place, and determine what the path is to that directory. For example, on Mac OS X or Linux, “Documents” in your home folder (whatever it is), can be noted as ~/Documents. In your terminal, change the current directory to your development directory using the cd (change directory) command:
cd ~/Documents
The tilde (~) means the home folder of the current user.
Windows uses a different notation I’m not familiar with, but might look something like this (the ~ does not seem to work with Windows, so the following assumes that your username is username):
cd C:\Users\username\Documents
coreos-vagrant
The final piece of software you’ll need is coreos-vagrant. Download it and unzip so that the coreos-vagrant exists in your development folder. For example, if you’ve decided to use ~/Documents for your development folder, you should be able to cd into coreos-vagrant by typing:
cd ~/Documents/coreos-vagrant
A plain-text editor
A plain text editor is different from Word or OpenOffice in that it only edits text. Often, it will also highlight special keywords in html, php, or other programming languages. Everyone seems to have their preferences for this, but to get started you could try the free TextWrangler for Mac OS X. The article The Best Free Text Editors for Windows, Linux, and Mac, on How-To Geek provides a list of editors. If you have your own editor, submit an issue suggesting it be added to this section, and why.
Some of the editors used by my colleagues include:
- Smultron (commercial): good search and replace interface, good proper formatting options.
- Taco (commercial)
- Netbeans (open source)
Setting up your development environment
Everything we’ve done until now was so that everyone following this course can work on the exact same platform, without getting stuck in different software versions, configurations, or platform idiosyncrasies. The platform we will be using for the rest of this course is called CoreOS, a tiny operating system on top of which we’ll run all of our software.
Now that we’re in the coreos-vagrant directory, type:
vagrant up
This can take a while depending on whether you’ve done it before, and depending on your internet connection. You should see a series of output similar to the following image.

You should be prompted for your password–this is the password you use to access your computer and it’s required to set up shared folders (more on that later).
Logging into CoreOS, your development environment
Now that we’ve built a CoreOS virtual machine, let’s log onto to:
vagrant ssh
You should be seeing something like this:
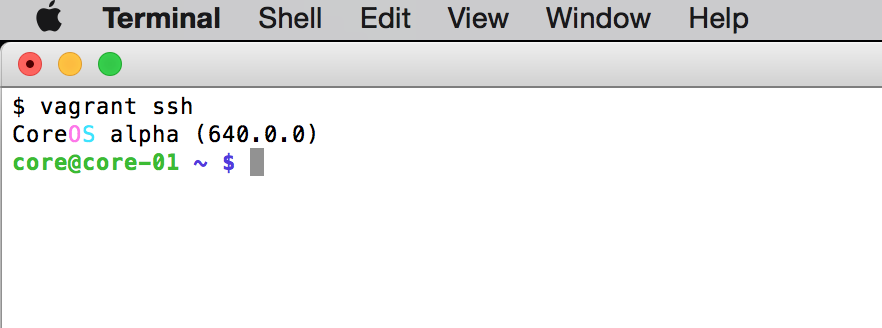
When you see core@core-01 ~ $ in your terminal, that means you are in your virtual CoreOS machine. Consider CoreOS as a separate computer, that is where work will take place.
From now on you will live and breathe the command line, like the pros. The core@core-01 ~ $ prompt (a prompt is some text that appears in your terminal to signal that the system is ready for next command) will become your best friend, you will grow to love it.
Shared folders
In order to be able to edit files on your virtual machine with the plain text editor we installed earlier, our CoreOS guest and our host computer (you should be understanding sentences like that now, if not go back and reread the beginning of this lesson!), which are isolated from one another, should nonetheless be able to share certain folders.
By default, if you installed CoreOS correctly, this is possible. On your host machine (your laptop), start by opening your plain text editor, create a file with a single line on it:
"Hello, CoreOS"
Then save it in ~/Documents/coreos-vagrant under the name hello.txt.
Now, go back to your terminal, make sure you are logged onto CoreOS (you should see the core@core-01 ~ $ prompt), and cd into share. List the contents of share using the ls (list) command, and you should see your hello.txt file.
Use the cat command to view the contents of hello.txt, and it should print out Hello, CoreOS.
core@core-01 ~ $ cd share
core@core-01 ~/share $ ls
CONTRIBUTING.md  README.md    clean.sh          hello.txt  user-data.sample
MAINTAINERS      Vagrantfile  config.rb.sample  phpunit
core@core-01 ~/share $ cat hello.txt
Hello, CoreOS
core@core-01 ~/share $
This way of doing things allows you to edit files directly on your host computer which you’re used to, yet run your software on a predictable environment, with the same software, the same versions, and same configuration as everyone else taking this course. This is DevOps in action.
Command line basics
A quick primer on the command line now. Go back to your host, and Download “Clean-Blog”, and put it in your coreos-vagrant folder, so that it appears here:
~/Documents/coreos-vagrant/startbootstrap-clean-blog-jekyll-gh-pages
We will use it to demonstrate a few key command line scripts (a script is something you can do on the command line), then you can delete it.
Now back to CoreOS, and cd into the shared startbootstrap-clean-blog-jekyll-gh-pages, like this:
core@core-01 ~ $ cd share/startbootstrap-clean-blog-jekyll-gh-pages/
ls will list what’s in that directory:
core@core-01 ~/share/startbootstrap-clean-blog-jekyll-gh-pages $ ls
Gruntfile.js  _config.yml  _posts        css       img         less
LICENSE       _includes    about.html    feed.xml  index.html  mail
README.md     _layouts     contact.html  fonts     js          package.json
Files starting with a period ., such as .gitignore, do not show in your computer’s file browser, or with ls. As developers we want to see them, so we’ll add the -a modifier to ls, like this:
core@core-01 ~/share/startbootstrap-clean-blog-jekyll-gh-pages $ ls -a
.           Gruntfile.js  _includes   contact.html  img         mail
..          LICENSE       _layouts    css           index.html  package.json
.DS_Store   README.md     _posts      feed.xml      js
.gitignore  _config.yml   about.html  fonts         less
You will probably prefer to see more information about files, such as the modification date, in which you can add the -l modifier, which added to the -a modifier looks like this:
core@core-01 ~/share/startbootstrap-clean-blog-jekyll-gh-pages $ ls -la
total 104
drwxr-xr-x 22 501 root   748 Apr  8 17:11 .
drwxr-xr-x 26 501 cdrw   884 Apr  8 17:11 ..
-rw-r--r--  1 501 root  8196 Apr  8 17:11 .DS_Store
-rwxr-xr-x  1 501 root    18 Mar  3 20:29 .gitignore
-rwxr-xr-x  1 501 root  2216 Mar  3 20:29 Gruntfile.js
-rwxr-xr-x  1 501 root 11336 Mar  3 20:29 LICENSE
-rwxr-xr-x  1 501 root  1552 Mar  3 20:29 README.md
-rwxr-xr-x  1 501 root   534 Mar  3 20:29 _config.yml
drwxr-xr-x  5 501 root   170 Mar  3 20:29 _includes
drwxr-xr-x  5 501 root   170 Mar  3 20:29 _layouts
drwxr-xr-x  8 501 root   272 Mar  3 20:29 _posts
-rwxr-xr-x  1 501 root   797 Mar  3 20:29 about.html
-rwxr-xr-x  1 501 root  2505 Mar  3 20:29 contact.html
drwxr-xr-x  7 501 root   238 Mar  3 20:29 css
-rwxr-xr-x  1 501 root  1292 Mar  3 20:29 feed.xml
drwxr-xr-x  7 501 root   238 Mar  3 20:29 fonts
drwxr-xr-x 12 501 root   408 Mar  3 20:29 img
-rwxr-xr-x  1 501 root  1080 Mar  3 20:29 index.html
drwxr-xr-x  8 501 root   272 Mar  3 20:29 js
drwxr-xr-x  5 501 root   170 Mar  3 20:29 less
drwxr-xr-x  3 501 root   102 Mar  3 20:29 mail
-rwxr-xr-x  1 501 root   656 Mar  3 20:29 package.json
cat shows the contents of a given file. Let’s see what’s in .gitignore:
core@core-01 ~/share/startbootstrap-clean-blog-jekyll-gh-pages $ cat .gitignore
_site
node_modules
Let’s move on to a find utility now, grep. Although very powerful, a basic usage is to find lines with a specific word in them. Type grep hello, then type in a few lines with hello in them, and a few lines without, like this:
core@core-01 ~/share/startbootstrap-clean-blog-jekyll-gh-pages $ grep hello
line 1 contains "hello"
line 1 contains "hello"
line 2 contains "goodbye"
line 3 contains "hello again"
line 3 contains "hello again"
Notice that lines lines 1 and 3 have been repeated because they contain the word “hello”. If you don’t find this exciting, you should consider a different line of work.
So… what happened to our prompt. If you’re stuck in a script and want to get back to the prompt, control-c does it for you. Type control-c and get back to the prompt.
^C
core@core-01 ~/share/startbootstrap-clean-blog-jekyll-gh-pages $
Perhaps grep is not all that exciting on its own, but as with any script that takes input, we can feed it information (output) from another script using a pipe. Let’s say we want to list only the files in our current directory which contain the character “_”, would could list all files using ls -la, then pipe (|) the output to grep, like this:
core@core-01 ~/share/startbootstrap-clean-blog-jekyll-gh-pages $ ls -la | grep _
-rw-r--r--  1 501 root  8196 Apr  8 17:11 .DS_Store
-rwxr-xr-x  1 501 root   534 Mar  3 20:29 _config.yml
drwxr-xr-x  5 501 root   170 Mar  3 20:29 _includes
drwxr-xr-x  5 501 root   170 Mar  3 20:29 _layouts
drwxr-xr-x  8 501 root   272 Mar  3 20:29 _posts
That’s nice, but say we want to exclude .DS_Store: we could then pipe the result of ls -la | grep _ to grep again, this time using grep’s -v or exclusion modifier, excluding any line with “DS_Store” in it.
core@core-01 ~/share/startbootstrap-clean-blog-jekyll-gh-pages $ ls -la | grep _ | grep -v DS_Store
-rwxr-xr-x  1 501 root   534 Mar  3 20:29 _config.yml
drwxr-xr-x  5 501 root   170 Mar  3 20:29 _includes
drwxr-xr-x  5 501 root   170 Mar  3 20:29 _layouts
drwxr-xr-x  8 501 root   272 Mar  3 20:29 _posts
The pipe can be used for any script which takes input, not only grep.
grep can also be used to search for a specific string in an entire directory. Let’s say we want to figure out in which file we can find the string “This is what I do”, we can tell grep to search recursively (with the -R modifier) in the current directory (also known as dot, or .):
core@core-01 ~/share/startbootstrap-clean-blog-jekyll-gh-pages $ grep -R 'This is what I do' .
./about.html:description: "This is what I do."
In the above example, grep is telling us that “This is what I do.” has been found in ./about.html. The dot (.) means “current directory”, so ./about.html should be read as “about.html” in the current directory.
Autocomplete
Go back to your home folder by typing:
cd ~
(Note that cd will also bring you back to your home folder–~ is assumed).
cd
Two techniques are very widely used to get things done faster on the command line:
- The arrow up key. When using the arrow up, you will cycle through all your previous commands. Hit the arrow up key until you see
cd share/startbootstrap-clean-blog-jekyll-gh-pages, then press enter. This will bring you back to yourstartbootstrap-clean-blog-jekyll-gh-pagesdirectory. Now come back to your home folder by typingcd. - The tab key for autocompletion. This is useful to avoid typing a very long directory or file name. Once in your home folder, type
cd share/stathen hit tab. This will autocomplete tocd startbootstrap-clean-blog-jekyll-gh-pages.
Before moving on:
Before going on to the next lesson, make sure:
- Make sure you have VirtualBox installed on your local computer
- Make sure you have Vagrant installed on your local computer
- Make sure you’ve installed coreos-vagrant
- Make sure you have a plain text editor on your computer
- Make sure you have a running vagrant box with CoreOS, and can log onto it.
- You are comfortable with the commands
cd,ls,cat, the pipe (|),grep,find, aliases, control-x,vi, on your CoreOS guest.