Why have a local environment?
The blog we set up in the previous lessons is a website project hosted on GitHub. We have seen that we can open issues, and make changes directly on GitHub’s web interface. In this lesson you will take that one step further and host the code on your own laptop. In the next lesson we’ll run the site itself on our laptop.
Hosting the same project (in this case the blog we created) in more than one place, or creating more than one environment for a given project, is required for all but trivial sites.
The website that is publicly accessible is called the production site, and uses code from the production environment. You could get away with maintaining a personal blog directly on the production environment (the environment hosting your project as it is visible to the public). However, allowing different environments lets you:
- See changes before the public does.
- Implement automated testing to make sure your changes don’t break anything on production.
- Test different approaches to a problem in “throwaway” environments, which you can discard if your solution doesn’t work.
All of this is known generally as a development-stage-production workflow: change happens on development environments, get pushed to a staging environment (to be tested by a limited number of stakeholders), and finally to a production environment; with checks being done at every step, all of this to avoid breaking the production environment.
Managing several environments poses a few challenges, notably:
- Keeping track of different versions of the same project.
- Making sure the project behaves the same way on each environment.
We’ll look at the first in this lesson as we start using Git. We’ll look at the second in the next lesson, and learn more about DevOps.
Keeping track of different versions of the same project
The first thing we need is a robust mechanism for making sure we are always using the expected version of the same project. If you change a file called _config.yml on your environment, and I change the same file on mine, we need to have a workflow to make sure changes never get lost or overridden because of confusion over what’s the latest version of a given file.
For this we will use git, an industry-standard version control system, which we will look into in more detail in a future class. For now, simply keep in mind that bug fixes, new features, and changes to website and corresponding server configuration should be changed in a code file and committed to our version control system. As a professional web developer, you can’t fix a bug by logging into graphical user interface and making a change there; likewise, you can’t log into a production server, or even your local environment, and fix something directly there either. Moving files over FTP is also bad because changes are hard to trace. Everything we change must be via git, so it can be traced, and you can be blamed when things go wrong.
Later on in this lesson we will use git to synchronize local and remote changes. Local changes are the changes done on your laptop; remote changes are done directly on GitHub (or by a developer other than yourself).
Connecting your computer to GitHub using SSH keys
We’ll see in the lesson on security why it’s best to avoid passwords when we can. Here we will use a SSH key pair to connect your computer to GitHub.
SSH key pairs are used to connect computer A to computer B. In our case computer A is your CoreOS virtual machine; computer B is GitHub.
An SSH key pair comes in two parts:
- A private key, which you should never share with anyone, and which resides on computer A.
- A public key, which you should share with computer B, and which resides on computer A and computer B.
We will use this system to synchronize our blog code on GitHub and on our CoreOS machine. Let’s get started.
Log into CoreOS using vagrant ssh (see the previous lessons if you need to refresh your memory). Once logged in, create your SSH key pair like this:
core@core-01 ~ $ ssh-keygen -t rsa -C "your_email@example.com"
The system will ask you where to put the SSH key pair; choose the default answer by pressing enter. When asked for your passphrase, press enter (we’ll add a passphrase in the lesson on security a bit later on).
Your output should resemble:
Generating public/private rsa key pair.
Enter file in which to save the key (/home/core/.ssh/id_rsa):
Enter passphrase (empty for no passphrase):
Enter same passphrase again:
Your identification has been saved in /home/core/.ssh/id_rsa.
Your public key has been saved in /home/core/.ssh/id_rsa.pub.
The key fingerprint is:
84:7a:51:8e:8f:e9:3d:f0:5f:62:7e:4b:87:f0:db:c2 your_email@example.com
The key's randomart image is:
+---[RSA 2048]----+
|                 |
|                 |
|        S B +    |
|         = @ .   |
|        . *.* .  |
|      .     .    |
|       o   =     |
|         o +E+   |
|          . ++.  |
+-----------------+
You don’t need to worry about any of the above; if it worked, your public SSH key, which you will be sharing with computers and services which which you want to connect, has now been created.
When working with organizations and teams of developers, it is common to be asked for you public SSH key when requesting access to a server. It’s OK for anyone to have your public SSH key (not your private one though!). Here is how to get your public SSH key:
core@core-01 ~ $ cat ~/.ssh/id_rsa.pub
ssh-rsa AAAAB3NzaC1yc2EAAAADAQABAAABAQDu1rH6lTeKwEM9liRmwRmhfe5cmxK5QmyOhp89rfvnRHnlsYEzMiz4MuoEzk2ge3CZfOaf0tPWlZ9v0FRlWDlcouET5RjEIlr2X37QqLkEVlFtcaex1s4KcYRVdf8TC09iMXZVUlEUNevgkyCOlrbxjkn7YkOxxcxkzdq3f9xwfJ5KVpGtCg8wKfO1LRWCo3KvODdNGXypqs90QafJPxc40DytwHWYl3G1P2/KMrmOmODBvIA3qw5KHhafkU4zALhrswXt+OAruEHl8yRocrcqQ/olnccHQrqydfgXFPAj6/12aKSICI/+8IqMbNn+ZLdNKbyDnZzgs0IjOYbMbnPJ your_email@example.com
Everything from ssh-rsa to your email address, inclusively, is your public SSH key.
Let’s now log back onto our GitHub account, and add our public SSH key there.
Start by clicking on your username in the upper-right corner of GitHub.
Now click on “Edit profile”.

In the left sidebar, click on “SSH keys”, and then, at the top right, “Add SSH keys”. You can now add your SSH key for GitHub, and give it a name:
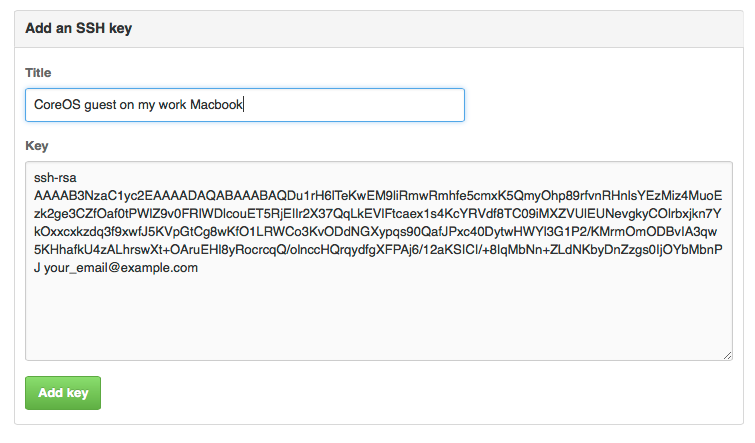
You can add any number of public SSH keys to GitHub (or any server).
Cloning your project code onto your computer
Head back to your project page on GitHub, and locate the “clone URL” section, select “SSH”. You should be seeing something like this:
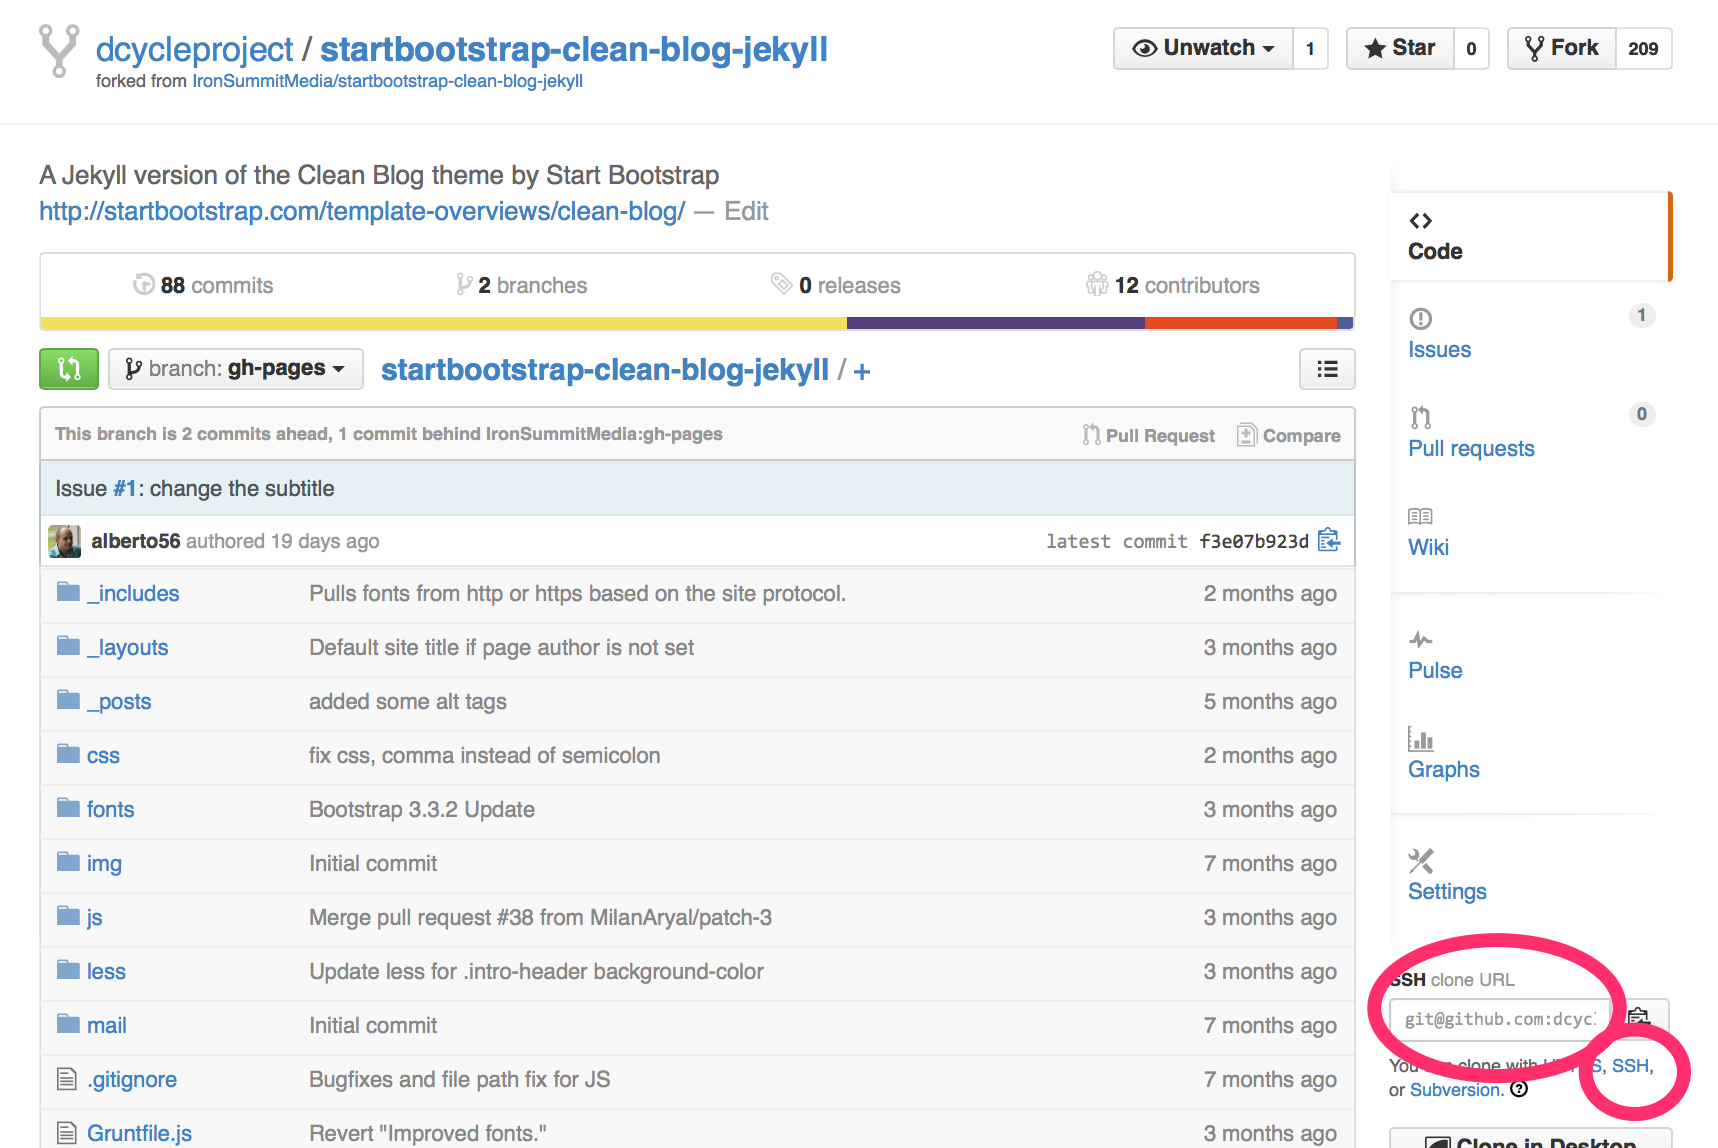
Copy the ssh address of your git repository (or git repo), and clone it on your CoreOS instance. Make sure to do so within the ~/share/ folder, so you also have acces to it form your host machine (so you can edit files with the text editor you installed in the previous lesson). Make sure you see something like this (your git repo URL will differ):
core@core-01 ~/share $ git clone git@github.com:dcycleproject/startbootstrap-clean-blog-jekyll.git
Cloning into 'startbootstrap-clean-blog-jekyll'...
The authenticity of host 'github.com (192.30.252.129)' can't be established.
RSA key fingerprint is 16:27:ac:a5:76:28:2d:36:63:1b:56:4d:eb:df:a6:48.
Are you sure you want to continue connecting (yes/no)? yes
Warning: Permanently added 'github.com,192.30.252.129' (RSA) to the list of known hosts.
remote: Counting objects: 382, done.
remote: Total 382 (delta 0), reused 0 (delta 0), pack-reused 382
Receiving objects: 100% (382/382), 1.93 MiB | 1.66 MiB/s, done.
Resolving deltas: 100% (201/201), done.
Checking connectivity... done.
You will be asked whether you trust the fingerprint of the GitHub site. Check that it is the same as the one on the GitHub website to make sure you are not logging into a site pretending to be GitHub (this is especially of interest if you are using a public wifi network). Note that once you accept the authenticity of the fingerprint, you won’t be asked for it again. The same goes for any other server you are dealing with, not just GitHub.
Now cd into the directory containing your code:
core@core-01 ~/share $ cd startbootstrap-clean-blog-jekyll
core@core-01 ~/share/startbootstrap-clean-blog-jekyll $
Synchronize code between your computer and GitHub
In lesson 1.1, you changed the title of your blog in GitHub. Change it again now, on GitHub, to something else.
Back in CoreOS, pull your the change you made in GitHub:
core@core-01 ~/share/startbootstrap-clean-blog-jekyll $ git pull origin gh-pages
If you set up SSH keys correctly, you should not be prompted for your password; if you are, please report an issue. At this point, your local code should contain the change you just made in GitHub. origin is, in this case, GitHub; gh-pages is the branch we’re working on. Don’t worry too much about branches right now; in a future lesson we will look more into Git.
Because of shared folders, ~/share/startbootstrap-clean-blog-jekyll ad ~/Documents/coreos-vagrant/startbootstrap-clean-blog-jekyll on your laptop are the same folder. So you can use your laptop’s OS and your preferred plain-text editor to modify your title. If you’re having trouble with this, please see the paragraph “A word on what to do if you laptop on the Vagrant CoreOS VM get unsynchronized”, below.
Now change your title locally (on your computer), back to what it was before, then we need to commit the change and push it back to GitHub.
core@core-01 ~/share/startbootstrap-clean-blog-jekyll $ git commit -am 'changed title'
If this is the first time you are running git commit, git will insist on knowing how you are:
*** Please tell me who you are.

Run

git config --global user.email "you@example.com"
git config --global user.name "Your Name"

to set your account's default identity.
Omit --global to set the identity only in this repository.

fatal: unable to auto-detect email address (got 'core@core-01.(none)')
This information is important to be able to trace changes to code, especially when more than one person is involved. It is something you’ll need to do only once; run the git config … commands listed above, but with your own name and email address, then commit again.
core@core-01 ~/share/startbootstrap-clean-blog-jekyll $ git config --global user.email "yourname@example.com"
core@core-01 ~/share/startbootstrap-clean-blog-jekyll $ git config --global user.name "Your Name"
core@core-01 ~/share/startbootstrap-clean-blog-jekyll $ git commit -am 'changed title'
Once you have committed your change, you can push your change to GitHub:
core@core-01 ~/share/startbootstrap-clean-blog-jekyll $ git push origin gh-pages
A word on what to do if you laptop on the Vagrant CoreOS VM get unsynchronized
In some cases your core OS’s ~/share folder and the corresponding ~/Documents/coreos-vagrant folder on your laptop can get unsynchronized: for example, ~/share will become incomplete, or downright empty, on CoreOS.
If this happens to you, simply restart the Vagrant VM like this:
$ vagrant reload
Next step: a full fledged environment
We now have our project’s code on our computer, but to see it in action in a browser, we need to push to it GitHub. The next lesson will show you how to set up a local environment on your computer, so you can see what your code does, directly on your computer, before sharing it with the world. But first:
Before moving on:
Before looking at the next lesson, you should now be familiar with:
- Moving changes to and from your laptop and GitHub with Git.
- How to find your public ssh key.